Magma Dungeon: mudanças entre as edições
Ir para navegação
Ir para pesquisar

Sem resumo de edição |
|||
| (12 revisões intermediárias por 3 usuários não estão sendo mostradas) | |||
| Linha 1: | Linha 1: | ||
<br> | <br> | ||
[[Arquivo:DG Heatran.png|1125x189px|center]] | [[Arquivo:DG Heatran.png|1125x189px|center]] | ||
<div class="off-topic"> | |||
<br> | <br> | ||
== | {| style="width: 100%;text-align: center; border-collapse: separate !important; border: 1px solid #a2a9b100 !important; border-radius: 15px; box-shadow: 0px 0px 4px 2px rgba(0,0,0,0.25); padding: 10px;" class="wikitable sortable quest" | ||
|- | |||
! style="background: linear-gradient(90deg, rgb(21,75,122) 0%, rgb(22,93,122) 100%); height: 40px; font-family: Helvetica, Arial, Times New Roman; font-size: 16px; color: white; border-radius: 10px; padding-right: 0px; width: 200px;" | Level | |||
! style="background: linear-gradient(90deg, rgb(23 93 122) 0%, rgb(24 105 122) 100%); height: 40px; font-family: Helvetica, Arial, Times New Roman; font-size: 16px; color: white; border-radius: 10px; padding-right: 0px; width: 200px;" | [[Premium Account|Premium]] | |||
! style="background: linear-gradient(90deg, rgb(23 105 122) 0%, rgb(25 111 123) 100%); height: 40px; font-family: Helvetica, Arial, Times New Roman; font-size: 16px; color: white; border-radius: 10px; padding-right: 0px; width: 200px;" | Requirement | |||
! style="background: linear-gradient(90deg, rgb(25 111 123) 0%, rgb(26 140 123) 100%); height: 40px; font-family: Helvetica, Arial, Times New Roman; font-size: 16px; color: white; border-radius: 10px; padding-right: 0px; width: 200px;" | Party | |||
! style="background: linear-gradient(90deg, rgb(26 140 123) 0%, rgb(27 145 124) 100%); height: 40px; font-family: Helvetica, Arial, Times New Roman; font-size: 16px; color: white; border-radius: 10px; padding-right: 0px; width: 200px;" | Max Time | |||
! style="background: linear-gradient(90deg, rgb(26 140 123) 0%, rgb(27 145 124) 100%); height: 40px; font-family: Helvetica, Arial, Times New Roman; font-size: 16px; color: white; border-radius: 10px; padding-right: 0px; width: 200px;" | Cooldown | |||
|- style="background: linear-gradient(90deg, #f8f9fa 0%, #e8f4f2 100%); color: #000; text-align: center; width: 10%; border: 1px solid transparent; border-radius: 10px" | |||
| style="border: 1px solid transparent;" | 400 | |||
| style="border: 1px solid transparent;" | [[Arquivo:Vipon_2.png|link=Dungeons]] | |||
| style="border: 1px solid transparent;" | - | |||
| style="border: 1px solid transparent;" | 2 - 4 | |||
| style="border: 1px solid transparent;" | 1h 30m | |||
| style="border: 1px solid transparent;" | 40h 0m | |||
|} | |||
<b style="color: FireBrick;">Obs.:</b> O grupo deve ser formado utilizando o sistema de [[Party System|Party]].<br> | |||
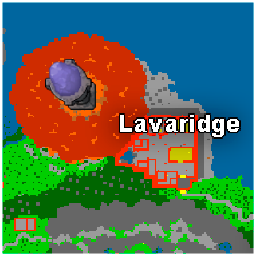
== Localização == | == Localização == | ||
A entrada situa-se ao Oeste da cidade de Lavaridge. | A entrada situa-se ao Oeste da cidade de Lavaridge. | ||
<br> | |||
[[Arquivo:Dungeon_magma.png|link=Magma Dungeon|Magma Dungeon]] | |||
== Missões == | == Missões == | ||
| Linha 18: | Linha 35: | ||
* '''Task 3''': Atravesse os vulcões e chegue até o final do caminho. | * '''Task 3''': Atravesse os vulcões e chegue até o final do caminho. | ||
* '''Task 4''': Derrotar o Heatran. | * '''Task 4''': Derrotar o [[Heatran]]. | ||
== Recompensas == | == Recompensas == | ||
{| style="width: 60%;text-align: center; border-collapse: separate !important; border: 1px solid #a2a9b100 !important; border-radius: 15px; box-shadow: 0px 0px 4px 2px rgba(0,0,0,0.25); padding: 10px;" class="wikitable sortable quest" | |||
|- | |||
! style="background: linear-gradient(90deg, rgb(21,75,122) 0%, rgb(22,93,122) 100%); height: 40px; font-family: Helvetica, Arial, Times New Roman; font-size: 16px; color: white; border-radius: 10px; padding-right: 0px; width: 80px;" | # | |||
! style="background: linear-gradient(90deg, rgb(23 93 122) 0%, rgb(24 105 122) 100%); height: 40px; font-family: Helvetica, Arial, Times New Roman; font-size: 16px; color: white; border-radius: 10px; padding-right: 0px; width: 80px;" | Nome | |||
! style="background: linear-gradient(90deg, rgb(23 105 122) 0%, rgb(25 111 123) 100%); height: 40px; font-family: Helvetica, Arial, Times New Roman; font-size: 16px; color: white; border-radius: 10px; padding-right: 0px; width: 80px;" | Chance | |||
|- style="background: linear-gradient(90deg, #f8f9fa 0%, #e8f4f2 100%); color: #000; text-align: center; width: 10%; border:parent; border-radius: 10px" | |||
| style="width:200px; text-align:center;" |[[Arquivo:Infernape Backpack.png|link=Backpacks]] | |||
| style="width:200px; text-align:center;" | Infernape Backpack | |||
| style="width:200px; text-align:center;" | 65% | |||
|- style="background: linear-gradient(90deg, #f8f9fa 0%, #e8f4f2 100%); color: #000; text-align: center; width: 10%; border:parent; border-radius: 10px" | |||
| style="width:200px; text-align:center;" |[[Arquivo:Volcanic Sphere.png]] | |||
| style="width:200px; text-align:center;" | Volcanic Sphere | |||
| style="width:200px; text-align:center;" | 24% | |||
|- style="background: linear-gradient(90deg, #f8f9fa 0%, #e8f4f2 100%); color: #000; text-align: center; width: 10%; border:parent; border-radius: 10px" | |||
| style="width:200px; text-align:center;" |[[Arquivo:Volcanic Lantern.png]] | |||
| style="width:200px; text-align:center;" | Volcanic Lantern | |||
| style="width:200px; text-align:center;" | 24% | |||
|- style="background: linear-gradient(90deg, #f8f9fa 0%, #e8f4f2 100%); color: #000; text-align: center; width: 10%; border:parent; border-radius: 10px" | |||
| style="width:200px; text-align:center;" |[[Arquivo:Volcanic Table.png]] | |||
| style="width:200px; text-align:center;" | Volcanic Table | |||
| style="width:200px; text-align:center;" | 24% | |||
|- style="background: linear-gradient(90deg, #f8f9fa 0%, #e8f4f2 100%); color: #000; text-align: center; width: 10%; border:parent; border-radius: 10px" | |||
| style="width:200px; text-align:center;" |[[Arquivo:Metal coat.png|link=Held Item]] | |||
| style="width:200px; text-align:center;" | [[Held Item|Metal Coat]] | |||
| style="width:200px; text-align:center;" | 9% | |||
|- style="background: linear-gradient(90deg, #f8f9fa 0%, #e8f4f2 100%); color: #000; text-align: center; width: 10%; border:parent; border-radius: 10px" | |||
| style="width:200px; text-align:center;" | [[Arquivo:Incinerator Outfit.png|link=Incinerator Outfit]] [[Arquivo:Incinerator Outfit male.png|64px|link=Incinerator Outfit]] [[Arquivo:Incinerator Outfit female.png|64px|link=Incinerator Outfit]] | |||
| style="width:200px; text-align:center;" | [[Incinerator Outfit]] | |||
| style="width:200px; text-align:center;" | 9% | |||
|- style="background: linear-gradient(90deg, #f8f9fa 0%, #e8f4f2 100%); color: #000; text-align: center; width: 10%; border:parent; border-radius: 10px" | |||
| style="width:200px; text-align:center;" | [[Arquivo:Bright Powder.png|link=Held Item]] | |||
| style="width:200px; text-align:center;" | [[Held Item|Bright Powder]] | |||
| style="width:200px; text-align:center;" | 2% | |||
|- style="background: linear-gradient(90deg, #f8f9fa 0%, #e8f4f2 100%); color: #000; text-align: center; width: 10%; border:parent; border-radius: 10px" | |||
| style="width:200px; text-align:center;" | [[Arquivo:Fire type tm disk.png|link=TM74 - Incinerate]] | |||
| style="width:200px; text-align:center;" | [[TM74 - Incinerate|TM74 - Incinerate]] | |||
| style="width:200px; text-align:center;" | 2% | |||
|- style="background: linear-gradient(90deg, #f8f9fa 0%, #e8f4f2 100%); color: #000; text-align: center; width: 10%; border:parent; border-radius: 10px" | |||
| style="width:200px; text-align:center;" | [[Arquivo:+XP.png|64px]] | |||
| style="width:200px; text-align:center;" | 200.000 XP | |||
| style="width:200px; text-align:center;" | 100% | |||
|} | |||
Além dos prêmios acima, tem a chance de dropar o Skull Candle addon e o Baby Shiny Charizard ao derrotar os Magmortar Incinerator. | Além dos prêmios acima, tem a chance de dropar o Skull Candle addon e o Baby Shiny Charizard ao derrotar os Magmortar Incinerator. | ||
<br> | <br> | ||
| Linha 125: | Linha 102: | ||
</table> | </table> | ||
'''Big Mushroom pode ser obtido como prêmio extra ao derrotar minibosses e no prêmio final da dungeon.''' | |||
<br> | |||
<table style="color: #fff;"> | |||
<tr style="background-color:#f73636; text-align:center"> | |||
<td style="width: 200px;"><small>'''[[Craft System|Big Mushroom]]'''</small></td> | |||
</tr> | |||
<tr style="text-align:center"> | |||
<td style="width: 200px;">[[Arquivo:Big mushroom.png|link=Craft System]]</td> | |||
</tr> | |||
</table></center> | |||
Edição atual tal como às 13h12min de 18 de março de 2025

| Level | Premium | Requirement | Party | Max Time | Cooldown |
|---|---|---|---|---|---|
| 400 | - | 2 - 4 | 1h 30m | 40h 0m |
Obs.: O grupo deve ser formado utilizando o sistema de Party.
Localização
A entrada situa-se ao Oeste da cidade de Lavaridge.
Missões
- Task 1: Colete rochas e use-as para formar um caminho pela lava.
- Task 2: Colete lava nos geysers, encha os basins e derrote os os Magmortar Incinerator para abrir o caminho.
- Task 3: Atravesse os vulcões e chegue até o final do caminho.
- Task 4: Derrotar o Heatran.
Recompensas
| # | Nome | Chance |
|---|---|---|
| Infernape Backpack | 65% | |

|
Volcanic Sphere | 24% |

|
Volcanic Lantern | 24% |

|
Volcanic Table | 24% |
| Metal Coat | 9% | |
 
|
Incinerator Outfit | 9% |
| Bright Powder | 2% | |
| TM74 - Incinerate | 2% | |

|
200.000 XP | 100% |
Além dos prêmios acima, tem a chance de dropar o Skull Candle addon e o Baby Shiny Charizard ao derrotar os Magmortar Incinerator.
| Skull Candle addon | Magmortar | Shiny Magmortar |
 |
 |
|
| Baby Shiny Charizard | ||
 |
Big Mushroom pode ser obtido como prêmio extra ao derrotar minibosses e no prêmio final da dungeon.
| Big Mushroom |